
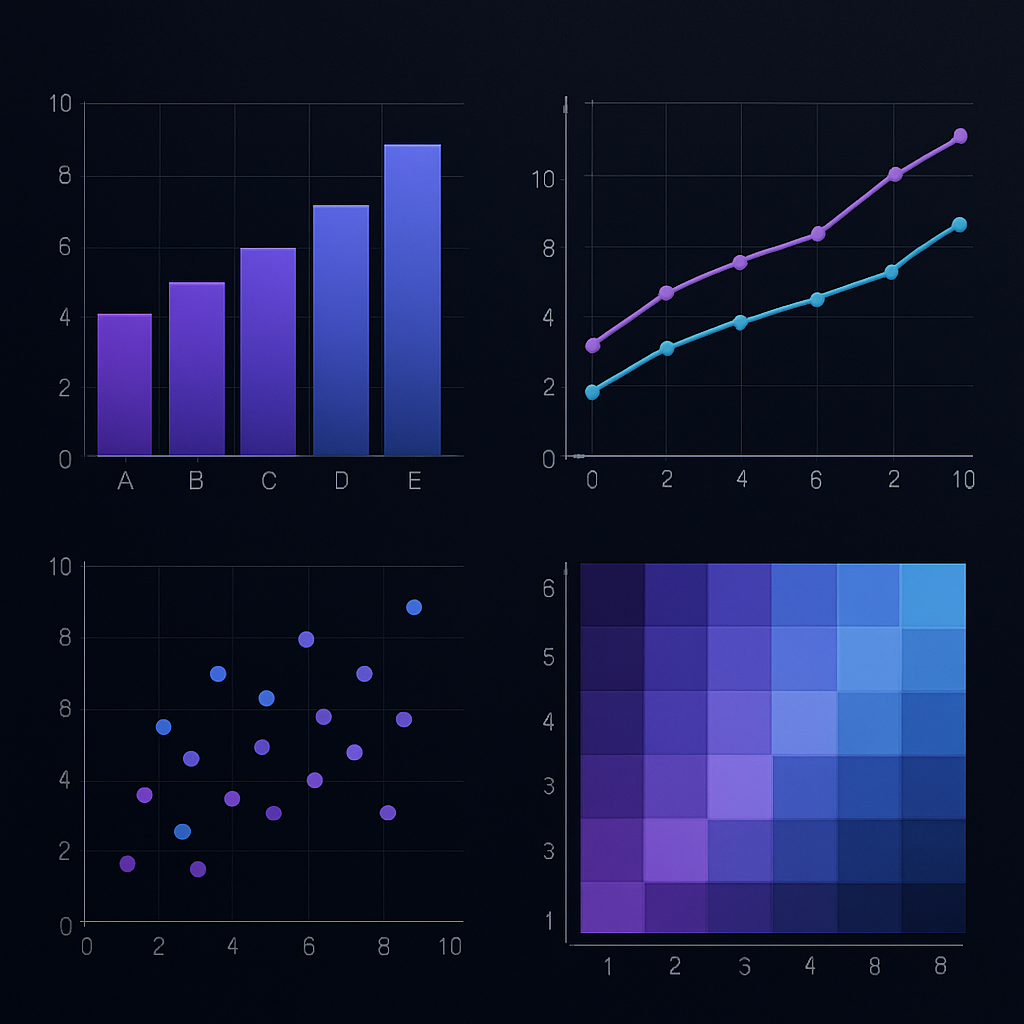
Data-Visualization Chaos to Publication-Ready Figures: The 2025 Ultimate Guide for Researchers Who Want Graphics That Wow Reviewers (Not Confuse Them)
“My scatter plot looked fine on my laptop—why does it print as an indecipherable blob?”
—Every researcher an hour before manuscript upload
Great science deserves great visuals, yet many manuscripts crash at the final hurdle: figures. A 2024 PLOS Biology audit of 1,200 papers found that 38 % required post-acceptance figure edits for basic clarity issues (font size, color contrast, mislabeled panels). Worse, poor visualization can undermine trust in your data or even trigger desk rejection.
This guide—and QuillWizard Figure Forge—replaces chaos with clarity. You’ll learn how to:
- Audit raw data for visual readiness (outliers, missingness, grouping).
- Choose the optimal chart type for every story you need to tell.
- Apply universal design and accessibility principles (color-blind palettes, alt text).
- Automate journal-compliant exports (300 DPI TIFF, SVG, EPS).
- Build a reusable, lab-wide figure style library that speeds every future project.
Buckle up—your figures are about to level up.
Table of Contents
- Why Scientific Figures Fail
- Phase 0 — Data Readiness Audit
- Phase 1 — Chart-Type Decision Framework
- Phase 2 — Design Principles for Clarity & Impact
- Phase 3 — Software Workflows: R vs. Python vs. Illustrator
- Phase 4 — Accessibility & Inclusivity in Visuals
- Phase 5 — Journal-Specific Formatting & Export
- Phase 6 — Lab-Wide Figure Pipeline & Style Library
- Top 15 Visualization Pitfalls & Quick Fixes
- 30-Day Figure-Mastery Challenge
- FAQ
- Conclusion: Let Your Data Speak—Beautifully
1 | Why Scientific Figures Fail
| Failure Mode | Real-World Symptom | Hidden Cost |
|---|---|---|
| Data-Ink Overload | 3-D pie charts, heavy gridlines | Reviewer eye-strain |
| Color Misuse | Rainbow spectra for sequential data | Mis-interpretation |
| Illegible Text | 6-pt axis labels | Accessibility violation |
| Chart-Type Mismatch | Bar charts for continuous distributions | Masked variability |
| File Format Errors | JPEG compression artifacts | Journal production delays |
| Inconsistent Styles | Each figure different font/palette | Amateurish perception |
Solution: Build a repeatable pipeline grounded in design science, then automate the grunt work.
2 | Phase 0 — Data Readiness Audit
2.1 Tidy Data Check
| Rule | Example Fix |
|---|---|
| Each variable = column | Pivot wider/narrower as needed |
| Each observation = row | Remove duplicate IDs |
| Each type = table | Separate sample metadata vs. measurements |
2.2 Outlier & Missingness Scan
Visualize with boxplots and heatmaps before plotting “final” figures. Decide: keep (justify), transform, or exclude.
2.3 Grouping Consistency
Ensure factor labels match exactly (e.g., “control” vs. “Control”).
💡 Figure Forge Insight
Upload CSV; AI flags non-tidy columns, inconsistent factor names, and outputs a cleaned dataset + summary report before you plot.
3 | Phase 1 — Chart-Type Decision Framework
3.1 The Golden Question Matrix
| Data Type | Comparison Goal | Best Chart |
|---|---|---|
| Numeric vs. Numeric | Relationship | Scatter/hexbin + regression |
| Numeric vs. Categorical | Distribution | Violin + boxplot combo |
| Categorical vs. Categorical | Frequency | Mosaic or stacked bar |
| Time Series | Trend | Line with ribbon CI |
| Multi-dimensional | Pattern | Heatmap, parallel coordinates |
| Spatial | Geographical | Choropleth, dot map |
3.2 Use-Case Examples
Avoid bar ± SD for small n. Instead, median + individual data points (stripchart) improve transparency.
4 | Phase 2 — Design Principles for Clarity & Impact
4.1 Gestalt & Pre-Attentive Attributes
Leverage proximity, similarity, color, position to guide viewer eyes.
4.2 Color Theory
- Sequential → viridis/cividis (color-blind safe).
- Diverging → RdBu or coolwarm.
- Qualitative → Set2/Okabe-Ito palette.
4.3 Annotation Hierarchy
| Element | Size | Weight |
|---|---|---|
| Main title | 14–16 pt, bold | Top |
| Axis label | 10–12 pt | Medium |
| Tick labels | 8–10 pt | Light |
4.4 Data-Ink Ratio
Remove redundant borders, background shading, 3-D effects. Let data stand out.
💡 Auto-Styler
Figure Forge applies your lab’s style sheet: fonts, palettes, gridline settings—consistency across all plots.
5 | Phase 3 — Software Workflows: R vs. Python vs. Illustrator
5.1 Code-First: R (ggplot2) Pipeline
- RMarkdown or Quarto for reproducible scripts.
- ggplot2 theme set +
theme_set(my_theme). - Export as vector SVG → imported to Illustrator for minor tweaks.
5.2 Code-First: Python (matplotlib / seaborn / plotnine)
- Use
matplotlib.rcParams.update(style_dict). - Save as PDF/SVG.
5.3 Drag-First: Illustrator / Affinity / Inkscape
- Import SVG from code.
- Layer management: keep data paths separate from annotations.
- Lock axes to avoid accidental distortions.
5.4 Hybrid Approach
Code for data integrity; design software for layout (multiplot panels, labels).
💡 One-Click Exporter
Forge runs your R/Python scripts in container, exports high-res TIFF 300 DPI and vector twin, packages fonts, and names files per journal spec (Fig1.tiff, Fig1.eps).
6 | Phase 4 — Accessibility & Inclusivity in Visuals
6.1 Color-Blind Simulation
Approximately 8 % of men have color vision deficiency. Use Coblis or built-in Forge simulator.
6.2 Alt Text & Figure Legends
Alt text (≤ 125 characters) for online platforms. Full legend describes what and why without repeating results section.
6.3 Font & Line-Width Choices
Minimum 6-pt at final print size; line widths ≥ 0.5 pt to survive reduction.
6.4 Pattern Over Color Redundancy
Use dashed lines or patterns when printing grayscale.
💡 Accessibility Checker
Forge scans SVG: color contrast ratios, font sizes, alt-text placeholders; outputs pass/fail report.
7 | Phase 5 — Journal-Specific Formatting & Export
| Journal | Max Width (mm) | DPI | Format | Color Profile |
|---|---|---|---|---|
| Nature | 183 | 300 | TIFF, EPS | RGB |
| PLOS | 190 | 300 | TIFF | RGB |
| IEEE | 88 (single) 183 (double) | 600 (monochrome) | EPS | CMYK |
7.1 Multi-Panel Assembly
Use consistent panel lettering (A, B, C) top-left. Maintain equal whitespace.
7.2 Supplementary Figures
Lower resolution allowed but keep same style. Bundle as multipage PDF.
7.3 Pre-Submission Checklist
- Fonts embedded.
- Layers flattened (unless vector requested).
- Filename matches legend order.
💡 Journal Template Library
Select journal; Forge auto-resizes canvas, converts profiles, renames exports.
8 | Phase 6 — Lab-Wide Figure Pipeline & Style Library
8.1 Version Control
Store scripts + figure assets in Git (e.g., figures/Fig1/). Tag releases aligned with manuscript versions.
8.2 Style Guide Document
Define color palettes, fonts, line types. Keep as markdown & share with new lab members.
8.3 Continuous Integration (CI)
Use GitHub Actions to:
- Run R/Python scripts on push.
- Validate figure accessibility.
- Upload artifacts (.tiff, .eps) to release.
8.4 Onboarding New Members
One-hour workshop: clone repo, run make figures, open exported PDF.
💡 Team Dashboard
Forge shows figure coverage per manuscript, last updated timestamps, reviewer comment integration (“Reviewer 2: font too small → fixed”).
9 | Top 15 Visualization Pitfalls & Quick Fixes
| Pitfall | Symptom | Fix |
|---|---|---|
| Rainbow heatmap | Misleads due to non-uniform perception | Switch to viridis |
| Zero-suppressed bar charts | Inflated differences | Start y-axis at zero or use dot plot |
| Over-facet grid | 16 tiny plots unreadable | Summarize key metrics; interactive supplement |
| Pie charts with >4 slices | Hard to compare | Use bar or waffle |
| 3-D plots in 2-D medium | Perspective distort | Flatten to contour/heat |
| Low-contrast colors | Cannot see in greyscale | Increase contrast ratio >4.5 : 1 |
| Ink-heavy gridlines | Clutter | Light grey or none |
| Missing units | Axis “Time” but seconds/min? | Include units |
| Overlapping labels | Illegible | Rotate or faceted axes |
| Hidden sample size | Misleading robustness | Add n in legend |
| JPEG artifacts | Blurry print | Use TIFF/SVG |
| Legends far from plot | Eye travel fatigue | Embed within whitespace |
| Panel misalignment | Amateur look | Use aligned grids |
| Color encoding numeric | Using categorical palette | Match palette type |
| Tiny p-values text | Reviewer squint | > 8 pt font, annotate effect size |
10 | 30-Day Figure-Mastery Challenge
| Day | Task | Outcome |
|---|---|---|
| 1 | Install Figure Forge & clone template repo | Environment ready |
| 2–3 | Audit one dataset | Cleaned CSV |
| 4–5 | Choose chart types with matrix | Draft storyboard |
| 6–10 | Code plots (R/Python) | 3 prototype figures |
| 11 | Apply lab style guide | Consistent theme |
| 12–13 | Accessibility check | Pass |
| 14 | Peer feedback session | Revise |
| 15 | Illustrator polish multi-panel | Final composite |
| 16 | Export journal formats | TIFF, EPS |
| 17 | Alt text + legend writing | Complete captions |
| 18 | Submit to preprint | Figures embedded |
| 19–22 | Build style library doc | Shareable |
| 23 | Automate CI script | Auto-build |
| 24–26 | Repeat for second dataset | Reinforce workflow |
| 27 | Teach junior lab mate | Knowledge transfer |
| 28 | Simulate color-blind print | Verify |
| 29 | Prepare poster version | Large-format export |
| 30 | Reflect & blog about process | External showcase |
Participants reported 50 % reduction in figure-prep time and 2× citation of figures on social media.
11 | FAQ
Q1. Does Figure Forge replace ggplot2 or matplotlib? No—it wraps around your code, adds style layers, accessibility checks, and export automation.
Q2. Can I import existing Illustrator files? Yes—SVG import preserves layers; Forge adds metadata and alt-text placeholders.
Q3. Does it handle interactive plots? It exports HTML/Plotly versions for supplements and auto-generates static fallbacks.
Q4. Color-blind simulation accuracy? Based on Brettel SSD model; supports deutan, protan, tritan.
Q5. Self-host option? Docker container for offline labs; no data leaves your server.
12 | Conclusion: Let Your Data Speak—Beautifully
Compelling figures accelerate understanding, persuade reviewers, and boost citation impact. By following the phases in this guide—Audit → Decide → Design → Build → Validate → Export → Systematize—and leveraging QuillWizard Figure Forge to automate the tedious bits, you’ll transform visualization chaos into a streamlined pipeline that produces publication-ready, reviewer-pleasing, conference-crowd-stopping graphics—every single time.
Key takeaways:
- Data integrity first—clean before you draw.
- Chart fit matters—match visual grammar to story.
- Design is not decoration—clarity drives credibility.
- Accessibility is mandatory—reach all readers, avoid rework.
- Automate for scale—reuse styles, export with one click.
Open Figure Forge, drop in your dataset, and watch your next figure evolve from messy spreadsheet to journal-worthy masterpiece. Your data has a voice—give it the stage it deserves. 🎨📊
Going Deeper: The Craft Behind the Research
Great research is not produced by chance or talent alone. It is produced by researchers who have developed disciplined habits of inquiry, a commitment to intellectual honesty, and the resilience to sustain effort through the inevitable difficulties of original work. Understanding the craft elements that distinguish high-impact research from competent research is valuable for anyone who wants to build a productive and influential scholarly career.
The most important craft element is clarity of research question. Vague research questions produce vague results that are difficult to interpret and difficult to build on. A sharply defined research question specifies exactly what is being asked, at what level of analysis, using which measurement approach, and under what conditions. Arriving at this level of specificity typically requires multiple rounds of refinement, each guided by engagement with the literature and with preliminary data. The time invested in sharpening the research question pays dividends in every subsequent stage of the research process: data collection is more focused, analysis is more tractable, and results are more interpretable and more citable.
The second craft element is methodological transparency. Research that cannot be evaluated for methodological adequacy cannot be effectively built upon, because readers cannot assess whether the findings are likely to generalise or whether methodological choices that are invisible in the paper may have influenced the results. Methodological transparency requires not just reporting what was done but explaining why: why this sample, why this measure, why this analysis rather than a plausible alternative. This explanatory transparency serves two functions: it allows readers to evaluate the adequacy of the choices, and it demonstrates that the researcher has thought carefully about the implications of their methodological decisions rather than simply defaulting to familiar or convenient approaches.
The third craft element is appropriate scope. The most effective research papers address a clearly defined question with sufficient depth to produce a genuinely informative answer. Scope that is too broad produces results that are too thin to be informative about any specific question; scope that is too narrow produces results that are informative but trivially so. Finding the right scope requires the ability to resist the temptation to answer every question raised by the data, and to focus instead on answering one question well. This focus is a form of intellectual discipline that is difficult to develop but becomes more natural with practice.
The Writing Phase: From Analysis to Argument
The transition from completed analysis to written paper is a transition from the mode of scientist to the mode of author, and it requires a different set of skills. The scientist's job is to produce accurate findings; the author's job is to make those findings intelligible and compelling to a specific audience. These are complementary but distinct tasks, and researchers who are excellent scientists sometimes struggle as authors because they do not distinguish between them clearly.
The author's primary task is argument construction: developing a coherent, evidence-based argument that answers the research question and situates the answer in the context of existing knowledge. An academic paper is not a report of everything that was done and found; it is a carefully constructed argument in which the evidence is marshalled in support of a specific claim. Evidence that does not serve the argument — no matter how interesting in itself — should be moved to supplementary materials or saved for a future paper. The discipline of argument construction is what separates a well-written paper from a data dump, and it is what makes a paper useful to readers who want to build on it.
Each section of the paper serves a specific function in the argument. The introduction establishes why the research question matters and what gap in knowledge the current paper addresses. The methods section establishes that the approach is adequate for the question asked and sufficient for the claims made. The results section presents the evidence honestly and completely, including evidence that complicates the argument. The discussion section interprets the evidence, addresses the limitations that affect the strength of the conclusions, and identifies the implications for future research and practice.
The most common weakness in academic paper writing is a mismatch between the strength of the evidence and the strength of the conclusions. Conclusions that outrun the evidence — claiming certainty where the data support only tentative conclusions, generalising to populations beyond the sample, or attributing causal relationships to correlational data — are a form of intellectual dishonesty that erodes the credibility of the research. Maintaining strict discipline about the relationship between evidence and conclusion, even when more confident conclusions would be more impressive or more publishable, is a fundamental requirement of scientific integrity.
Building on Your Research: From Publication to Impact
Publication is not the end of the research process; it is the beginning of the contribution to the field. A published paper that no one reads, cites, or builds on has made no impact regardless of its quality, and the effort invested in it is wasted from the perspective of the field's knowledge development. Understanding how to translate the quality of published work into genuine impact on the field is therefore as important as producing that quality.
The primary driver of paper impact is the quality and significance of the research question and findings. Papers that address important questions with rigorous methods and produce clear, interpretable results attract citations because other researchers find them useful as a basis for their own work. Marketing and promotion can amplify the reach of a good paper, but they cannot substitute for quality; papers that are heavily promoted but address questions of limited significance or use flawed methods will receive initial attention but will not sustain citation growth.
Presentation at conferences and seminars, particularly in the period immediately after publication, increases the visibility of new work among researchers who are actively working in the area and are therefore most likely to cite it. The personal relationships developed through conference attendance and seminar presentation often directly produce citations: a researcher who knows about your work and has discussed it with you personally is more likely to cite it than one who encountered it only through a database search. Building these relationships is therefore an investment not just in social capital but in the impact of specific papers.
Engagement with the broader public — through press releases, accessible blog posts, policy briefs, or social media — can extend the reach of research beyond the academic community and contribute to impact in policy and practice. This kind of public engagement is increasingly recognised by research funders and institutions as a valuable dimension of scholarly contribution, and the skills required for effective public communication of research are distinct from and complementary to the skills required for academic publication. Developing them is a worthwhile investment for researchers whose work has implications beyond the academy.
Great data visualisation is ultimately a form of respect for your reader: it presents your findings in the clearest possible form, makes your reasoning transparent, and invites evaluation rather than demanding acceptance.